Introduction
Many organisations buy measurement gear to conform with various quality system requirements, often in the ISO9000 series. This application note attempts to briefly outline how this is likely to relate to measurements. It does not attempt to be an all-embracing document, but rather to provide 'food for thought'.
Organisational requirements
Typically, the organisation must demonstrate that it is able to measure technical processes which affect it’s delivered product. This can vary quite widely, but may well include:
- The ability to properly verify that products meet basic specifications. e.g. cables, connectors, modems.
- The ability to ensure that processes such as splicing are performing as required.
- The ability to properly verify the characteristics of installed cables before the customer will take delivery of the installation.
- The ability to verify that an installed system has sufficient margin to operate reliably for its expected lifetime.
- The ability to check degradation and faults over the lifetime of the system and accept repair work.
The details of how these requirements translate into detailed specifications may be quite distinct. Typical factors that are relevant are:
- Size of the organisation. A one-man installer is likely to have different needs to a telecom company with 10,000 technicians. Training could be a major issue.
- Complexity and accuracy required. Some crews may make a wide range of measurements, some may do only one type. Commissioning and acceptance measurements are likely to be required to be more accurate than checking & maintenance measurements.
- IT support systems and expectations. For example, it may be expected that the acquired data will be held in a corporate database that can be accessed on the web or other internal networks by relevant employees.
- Cost benefits of the measurements. If a link is installed for an office computer, it may be possible to just use another computer in the same office if the link should fail, however if the link is in a spacecraft, repair might cost millions! Some links are valued at millions of dollars per hour in revenue, so a one-hour failure might be worth more than the whole T&M budget allocation.
- Environmental factors. An appliance used in Alaska is likely to encounter different extremes to an appliance used in the Sahara, which would be different to a rain forest. The most faults to repair would be reasonably expected to develop during the most extreme conditions.
- Specific customer requirements that must be met or promised availability specifications.
- Trade-off between capital cost and productivity in the measurement process, and the amount of expected (maintenance / construction activity).
- Expected changes to technical and other specifications that might be reasonably accommodated if possible ( eg upgrades, connector styles etc )
In addition to the calibration issues discussed here, you may need to satisfy laser safety issues in relation to work practices and ensure compliance with relevant requirements.
It is generally recognized that many expensive and frustrating failures are caused by human error, and this is particularly so with specification & control of organisational requirements. In many organisations the layering of work results in difficulties in translating a simple concept into detailed instructions and specifications. The use of a program such as Kingfisher KITS™, to link the field measurement process back to a corporate database, is a major element in improving the accuracy of the overall process.
A selection of measurement instruments
The broadest division of instruments is often between OTDRs and handhelds.
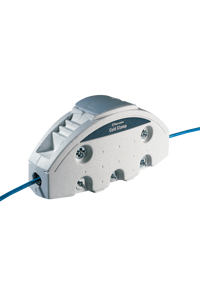
OTDRs are very useful for identifying faults, and for checking general loss after splicing. However, you should be aware that their ability to determine end to end loss should be questioned, since this is determined by inference (see application note 2). OTDR fault locating ability may be improved by use of a Cold Clamp (See Application Note 12).
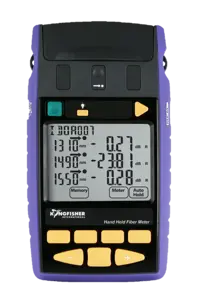
Therefore for end to end loss checking, a source and meter should be used. Sometimes these two functions are combined in a single instrument and called a loss test set. A system should always be checked at its expected and planned operational wavelengths.
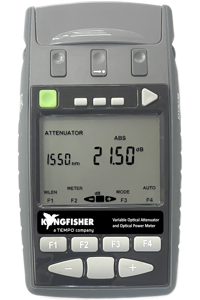
Meters are also used for absolute measurement of power levels in relation to transmit powers and receive levels on installed systems.
An OTDR is also able to infer likely values of return loss, however again for accurate accepting work, a return loss meter should be used to provide accurate results.
An attenuator is used for margin validation on the installed system.
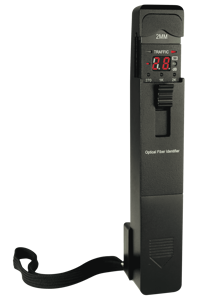
There are various instruments used to facilitate construction work, which are not used for final acceptance. These might be visible fault locators, clip-on identifiers etc. Control of these items is important since incorrect use could affect existing operating systems. Correct use could improve staff morale and productivity, and improve customer service.
Accuracy requirements
This is an area that requires careful consideration. Measurements are still relatively inaccurate, and high accuracy can be expensive. To further complicate the issue, it is common practice in this industry for the so-called ‘accuracy’ specification to be in fact the ‘calibration uncertainty‘ specification, which makes it very hard to determine how an instrument is likely to behave over a range of conditions. At Kingfisher, we are pleased to say that our instruments perform particularly well in this regard.
When determining instrument accuracy requirements, remember that you should investigate the overall accuracy achieved by your measurement process, so it is preferable to evaluate the expected measurement and data recording methods before purchasing.
You might also investigate the effects of wavelength tolerance, and how this limits the correspondence between measured and actual performance.
It is quite possible that measurement method uncertainty (e.g. varying connector losses ) and wavelength tolerance effects may dominate achieved measurement performance.
Alternatively, if ‘only measuring connector losses', it is likely that the instruments may limit your achieved accuracy.
Over-specifying costs money, under specifying costs more.
A learning process...
Many users are new to this area. It also happens that many sales personnel are new as well. By and large, the whole industry is learning, and you may not find it easy to get good answers to apparently simple questions. We hope our application notes will help, but in reality, you may need to address training and familiarization issues as an ongoing issue. Many personnel familiar with basically electronic concepts will have some difficulty picking up concepts in relation to optical fibers. Get several references from your best contacts before selecting a training course.
And so...
You think you have an idea of what you want to achieve, why, cost benefits and personnel issues, based on today’s requirements. You may also like to investigate if some business opportunity might arise from all this as well (sub-contract measurements, consulting work, improved end specifications, procurement savings, improved reliability etc). At the time of writing, some of the world’s most successful organisations are emphasising growth through service. They have embraced this as an essential business concept.
Quality systems and instrument traceability
This section has made it to a later page for good reason - it is only one of several issues.
The ISO9000 standards generally require that the calibration of critical measurement assets is performed against a traceable instrument. It may be required to get new assets re-calibrated if a correct calibration certificate was not supplied in the first place.
For non-critical process measuring, calibration may not be required (for example, a multimeter used to verify if a power supply is set at 9 V or 5 V would generally not need calibration, since it is not being used to set limits). If you can show that your measurement is a non-critical process checking tool, you can choose not to have it formally calibrated. In addition to the issue of formal calibration, you may also want to get instrument performance verified or checked. For example, suppose you bought an instrument which needed formal re-calibration only once every 3 years, the instrument could get damaged after one year, and then be out of specification for 2 years before the fault is discovered. To prevent this, you could arrange to get instruments checked in-house with relatively loose pass / fail specifications, and any units that fail are investigated further.
Some "instruments" doesn’t actually do any measuring ( e.g. a source ), and in these instances a check is appropriate.
When arranging formal calibrations, you should pay careful attention to the issue of the traceability of calibration. As a minimum, the reference against which the instrument was calibrated, must be traceable. However, this does not mean that the calibrated instrument can be used for calibrating further instruments ( e.g. as a secondary standard ).
If the calibrated instrument is itself to be used as a reference for calibrating other instruments, then this instrument itself must have a traceable calibration. This can only be done by a laboratory accredited by relevant national standards authorities to perform this calibration.
If you are clear yourself on the distinction between the two types of calibration, then you can ask laboratories exact questions, and understand the answers. Typically, failure to get the correct calibration is because the customer does not understand. Some laboratories also try and use confusing wording to disguise the fact that their calibrations have limited validity.
We are pleased to say that Kingfisher meters and attenuators are delivered with a full calibration certificate, so you can take them out of the box and use them for calibration of other assets to ISO9000 requirements. Most competitor instruments are delivered with a non-traceable certificate which says it was calibrated against a traceable unit, so you must get them re-calibrated before using them for calibration purposes. Some competitor gear is delivered with such a dubious certificate that it will not even pass use against basic ISO9000 requirements.
We now have a 3-year recommended calibration cycle on our meters. In between, you might want to perform some sort of check, at a lower cost.
The cost of ownership of an instrument is usually much more than the purchase cost, if just calibration is included. An extended calibration cycle is a major benefit. Calibration at each wavelength can typically cost from US$ 80 - 250 depending on location. On an annual basis for 2 wavelengths for 5 years, this amounts to US$ 800 - 2,500 excluding freight and inconvenience.
We get questions about if our calibrations are traceable in different countries. The answer is yes. This is by agreement between the national standards bodies between each country: there is no such thing as an ‘international standard ‘. For example, the major trading nations generally accept each other’s standards, otherwise there would be serious trade difficulties. For confirmation, you would have to ask your national standards body if NATA (the Australian standards body) is recognized by them.


